
Most of you know that I love a good creative project and that I also like variety... you could say that I'm forever on the look out for something interesting and different to try my hand at...and also to provide that much needed diversion to balance out life's challenges. So, one afternoon last week, I joined a friend of mine (Sam) to work on something I had never done before. Today on "Sanity Space" I would like to share with you some pictures of the process ....and of course a peek of the final article.
Sam is really good at making things... especially lampshade which she creates and crafts by hand...(taking inspiration from Victorian and Art Deco eras). She loves working with wood veneer, and uses laser cut, hand painted leather to decorate her projects...
...and she gave me the mission (and some tuition) to make a tea light/candle holder out of the same material.

You can get veneer in lots of different types of wood, but for my project I chose the American Walnut because I loved the contrast between the light and dark veins...(It was also the more flexible veneer, and was easier to work with!) Sam went with the Maple, a more resilient veneer which was harder to bend.

I was given a cutting board, ruler and scalpel to work with...

...and a specific template, created to the right dimensions, so that it would cover a particular size glass tealight holder.

The wood veneer is basically a very thin
piece of wood which is backed on paper ... so on the paper side we drew around the template...

...and then used a very sharp scalpel to score around it. The scalpel is now my new favourite tool...When the blade gets blunt you just snap a section off and there is a new blade waiting to use right below it!

Although the veneer is relatively thin... we had to do this a number of times before it cut all the way through the wood.

The next step was choosing which leather decoration to use from the selection that Sam had already designed, cut and painted.


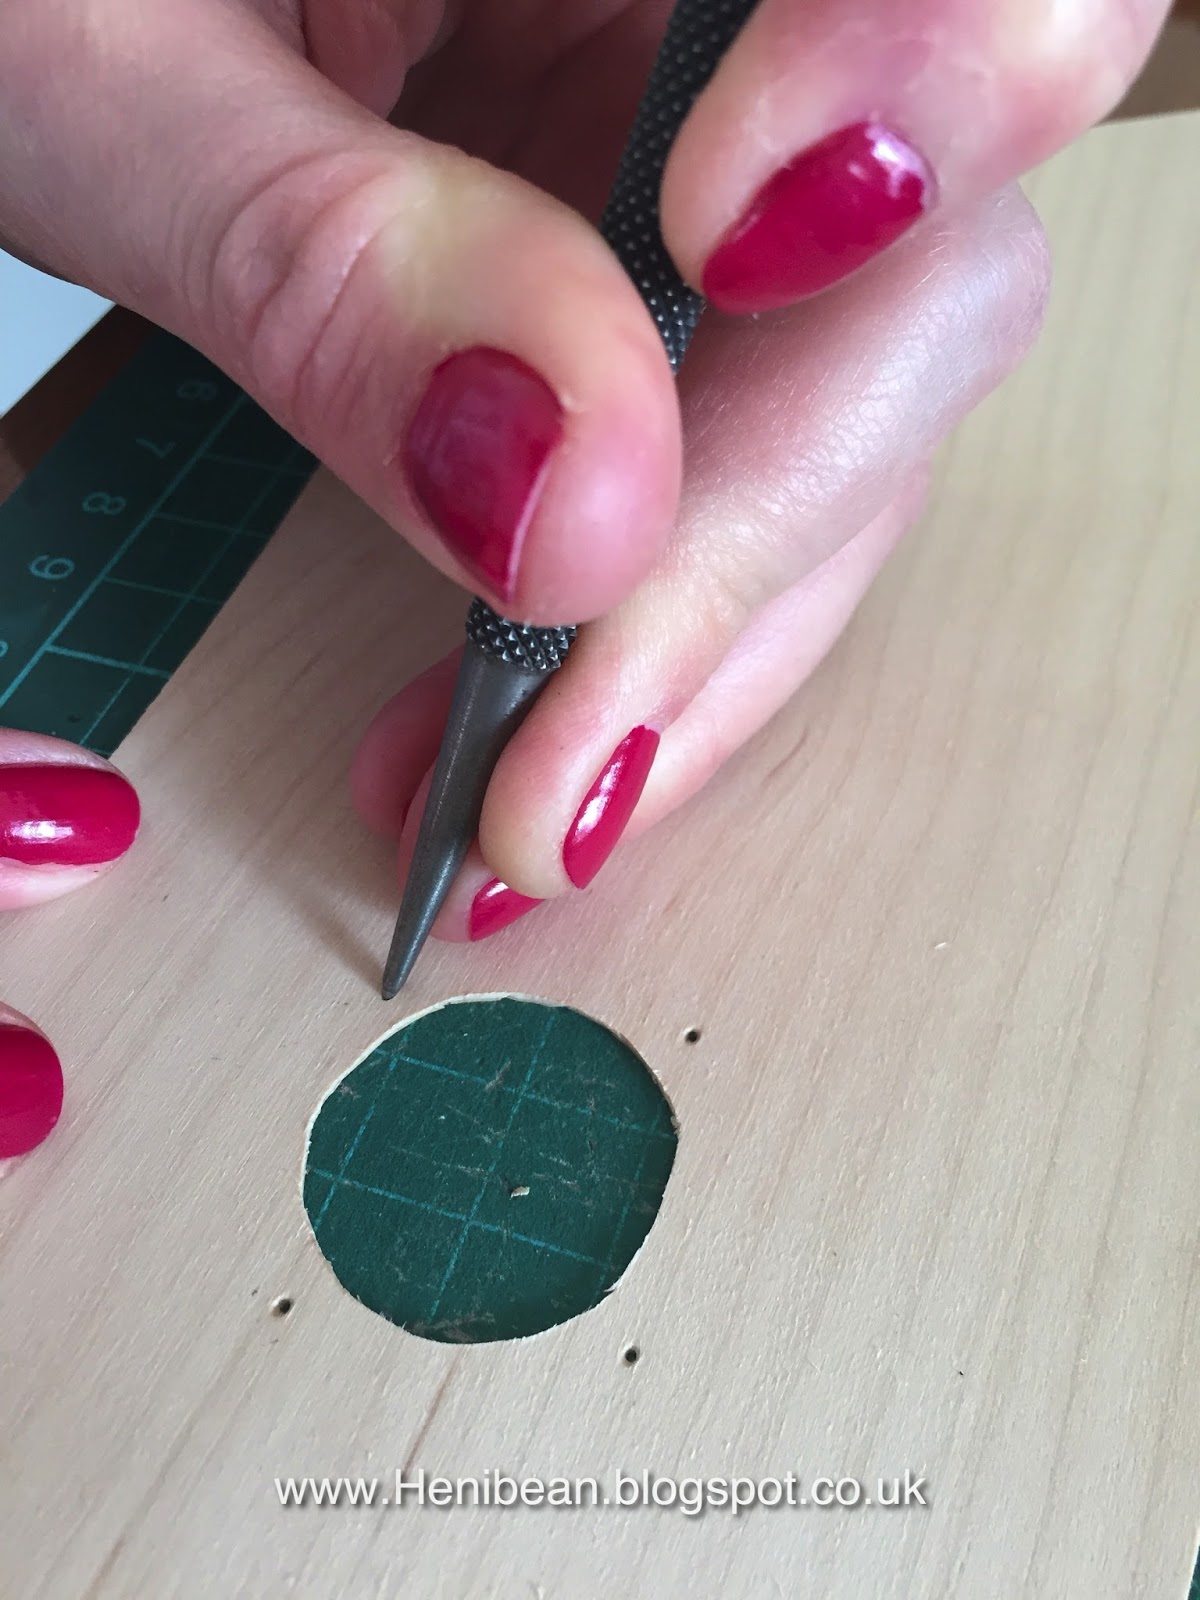
We then had to cut a hole the size of a two pence piece out of the wood, and the leather pattern was then aligned over the hole so that the light could shine though....

Holes were then punched though the leather (with and Awl)

....and also through the veneer (with a Scriber)
...so that we could put small gold fixings through the flower pattern and the wood...


... bending the pins over with pliers on the back and
attaching the two materials together.
attaching the two materials together.


The veneer was then
bent around the glass tea light holder to see where the two edges overlapped...

We marked the edge with a pencil line and then spread wood glue on the overlapping section.

The veneer was then curved around and clamped in place with the help of a thin strip of wood to prevent any bulges and warping of the glued edge.

The project then needed to be left to dry for at least 3-4 hours before removing the clamps.

and Voila....this was my finished tea light..!

I was really quite pleased with the result... and it wasn't bad for a first attempt....even though I made mine a bit on the small side and the glass holder is still slightly visible (oops). However I did have a great time learning something new, which is the most important bit!

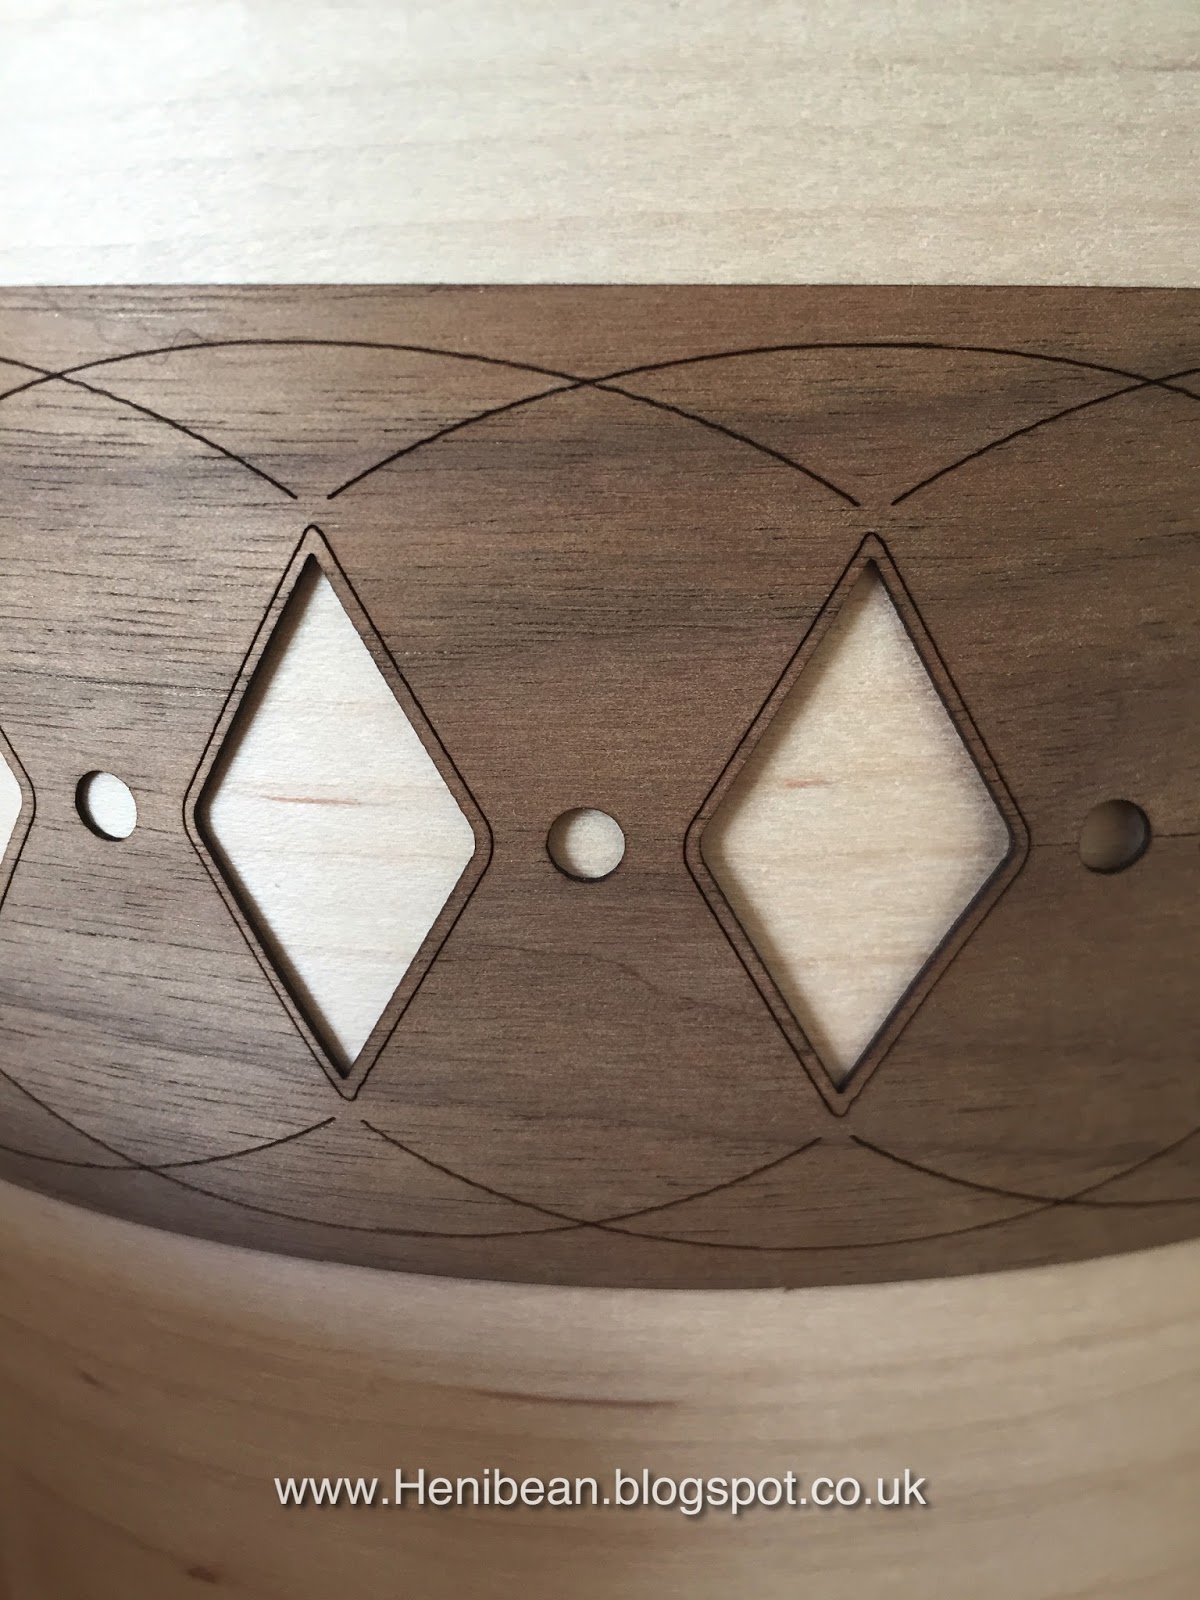
Working with these natural materials is a very satisfying process and the finished products look fantastic. All of Sam's creations are really lovely and she is a very talented lady. I love all of her lampshades, but I think my favourites are the ones that have the contrasting veneer bands with the diamond shapes on the most!

At the end of yet another Sanity Space project I feel like it was time very well spent....I often find that by working on a project it brings multiple benefits. Making the tea light holder that day gave me time to have fun, time to renew, build a friendship and yet again feel inspired to keep on creating... it also not only brought light to my load, but will now also bring a little light and cheer to my living room too!
I hope that by reading and seeing today's post you will also have been inspired to try something "new" ...and take some time to "renew".... oh and also to go schedule that creativity time for yourself TODAY!
...until next week..
Jx
If you would like to see some more of Sam's work you can find her at SweetPeaAndSam and follow all of her creations on twitter and Instagram
Those are so adorable! I'll be pinning for sure. ;)
ReplyDeleteHappy Friday!
Sarah (Your neighbor at #FMF) - www.sarahefrazer.com
I agree they are and was wonderful to share on the Oh My Heartsie Girls Friday Features this week, thank you!
DeleteHope you have a wonderful weekend!
I think they are lovely and it was great to learn how to make them with Sam who was very patient with me. Thanks for stopping in x
DeleteVery beautiful and creative! I have very few creative bones in my body :) always wish I had a talent to turn the simple into something beautiful. I was your neighbor at Dance with Jesus today ♥
ReplyDeleteI'm sure you have lots of other creative powers Nanette. Be sure to check out this weeks post on creativity! X
DeleteWow - I had no idea that wood veneer was so thin. I love this project and even though yours was a little on the smaller side, you still created it!!! so cool. thanks for sharing at #GiveMeGrace - where we are neighbors.
ReplyDeleteHi Debbie. It's such a neat material to work with and looks so lovely. I had fun with Sam learning how to do it x
DeleteWhat a neat crafting project. I have never thought to work with veneer.... might have to try this. Pinning it to my crafting board.
ReplyDeleteYes it's Very effect and satisfying to work with. Thanks for stopping in today X
DeleteThese are really beautiful! I'm so amazed at the intricate patterns and your skills :) Thanks for sharing at Together on Tuesdays!
ReplyDeleteThe intricate pattern was more Sams doing. She had designed and pre cut the flower! Maybe next time I can learn to do that!
DeleteThanks for linking up with us at Family Joy Blog Link Up Party. This looks like a neat craft project.
ReplyDeleteThanks Charlene x
DeleteAwesome job! The finished project is stunning :).
ReplyDeleteBe sure to check our Sams pages and see some more of her skills X
Deletelove how pretty the flowers are made by hand I have never seen anything done like this and love it
ReplyDeletecome see us at http://shopannies.blogspot.com
Thanks Angie x
DeleteSo beautiful in its simplicity! I love clean, fresh ideas and I imagine you had a blast creating. I'm passing this on! Thanks for sharing on the link-up...can't wait to see the next great idea:) Crystal~
ReplyDeleteThanks for sharing it Crystal. I'll be back to the next link up X
DeleteHello from Party at My Place...these are so unique and very creative. I love the designs. Quite the detail too.
ReplyDeleteYes I love Sams designs too. It was a real treat to work with her and make something so lovely.
DeleteHi Jade,
ReplyDeleteThis looks like a beautiful project. I'm so glad you enjoyed it!
Blessings and smiles,
Lori
I hope you get to do something fun this week too Lori x
DeleteYou must be an extremely precise worker. The results of your efforts are beautiful. (I love your blog design, too, by the way!)
ReplyDeleteThanks . It's amazing what you can do with a sharp scalpel!
DeleteI really love some the other designs Sam showed me ... The larger pieces must take so much more effort.
I love the process and the finished product. Wow - Thank you for sharing with us here at Tell me a Story.
ReplyDeleteThanks Hazel. It's now sitting in my living room!
DeleteYour creativity impressed me so deep! I like this natural feeling from your art. It makes any interior warmer and cozier.
ReplyDeleteI'm afraid I can't take the credit for the creativity as I was just told what to do and how to do it by Sam. Very fun though!
DeleteLove those! How adorable. I cannot wait until I don't have little hands and curious fingers in every second of my day to get back to crafts once in a while. Thanks for sharing with The Cozy Reading Spot
ReplyDelete